
Cross-device sync
TermZ is fully featured on a single machine. Optional Sync keeps your sessions, folders, tags, and credentials in step across devices — end-to-end encrypted, using storage you own.
How it works
Section titled “How it works”TermZ uploads an encrypted snapshot to any S3-compatible bucket you control. The snapshot is encrypted with a key derived from your master password before it leaves your machine, so the storage provider only ever sees ciphertext. To read it on another device you use the same master password — the key itself never travels.
Any S3-compatible storage works; this guide uses Cloudflare R2 because it’s cheap (generous free tier), fast, and has no egress fees. Snapshots are tiny, so this typically costs nothing.
Part 1 · Create a bucket on Cloudflare R2
Section titled “Part 1 · Create a bucket on Cloudflare R2”-
Create an R2 bucket. In the Cloudflare dashboard → R2 → Create bucket. Name it something like
termz-syncand pick a location. (If you don’t have R2 yet, you’ll be prompted to enable it — the free tier is fine.) -
Find your S3 API endpoint. It has the form:
https://<ACCOUNT-ID>.r2.cloudflarestorage.comYour account ID is shown in the R2 overview (and in each bucket’s Settings → S3 API). This is the Endpoint URL TermZ needs.
-
Create an API token. R2 → Manage R2 API Tokens → Create API token:
- Permission: Object Read & Write
- Scope it to only your sync bucket (
termz-sync) — least privilege. - Optionally set a TTL and rotate it periodically.
On creation you’ll get an Access Key ID and a Secret Access Key. Copy both now — the secret is shown only once.
Part 2 · Configure TermZ
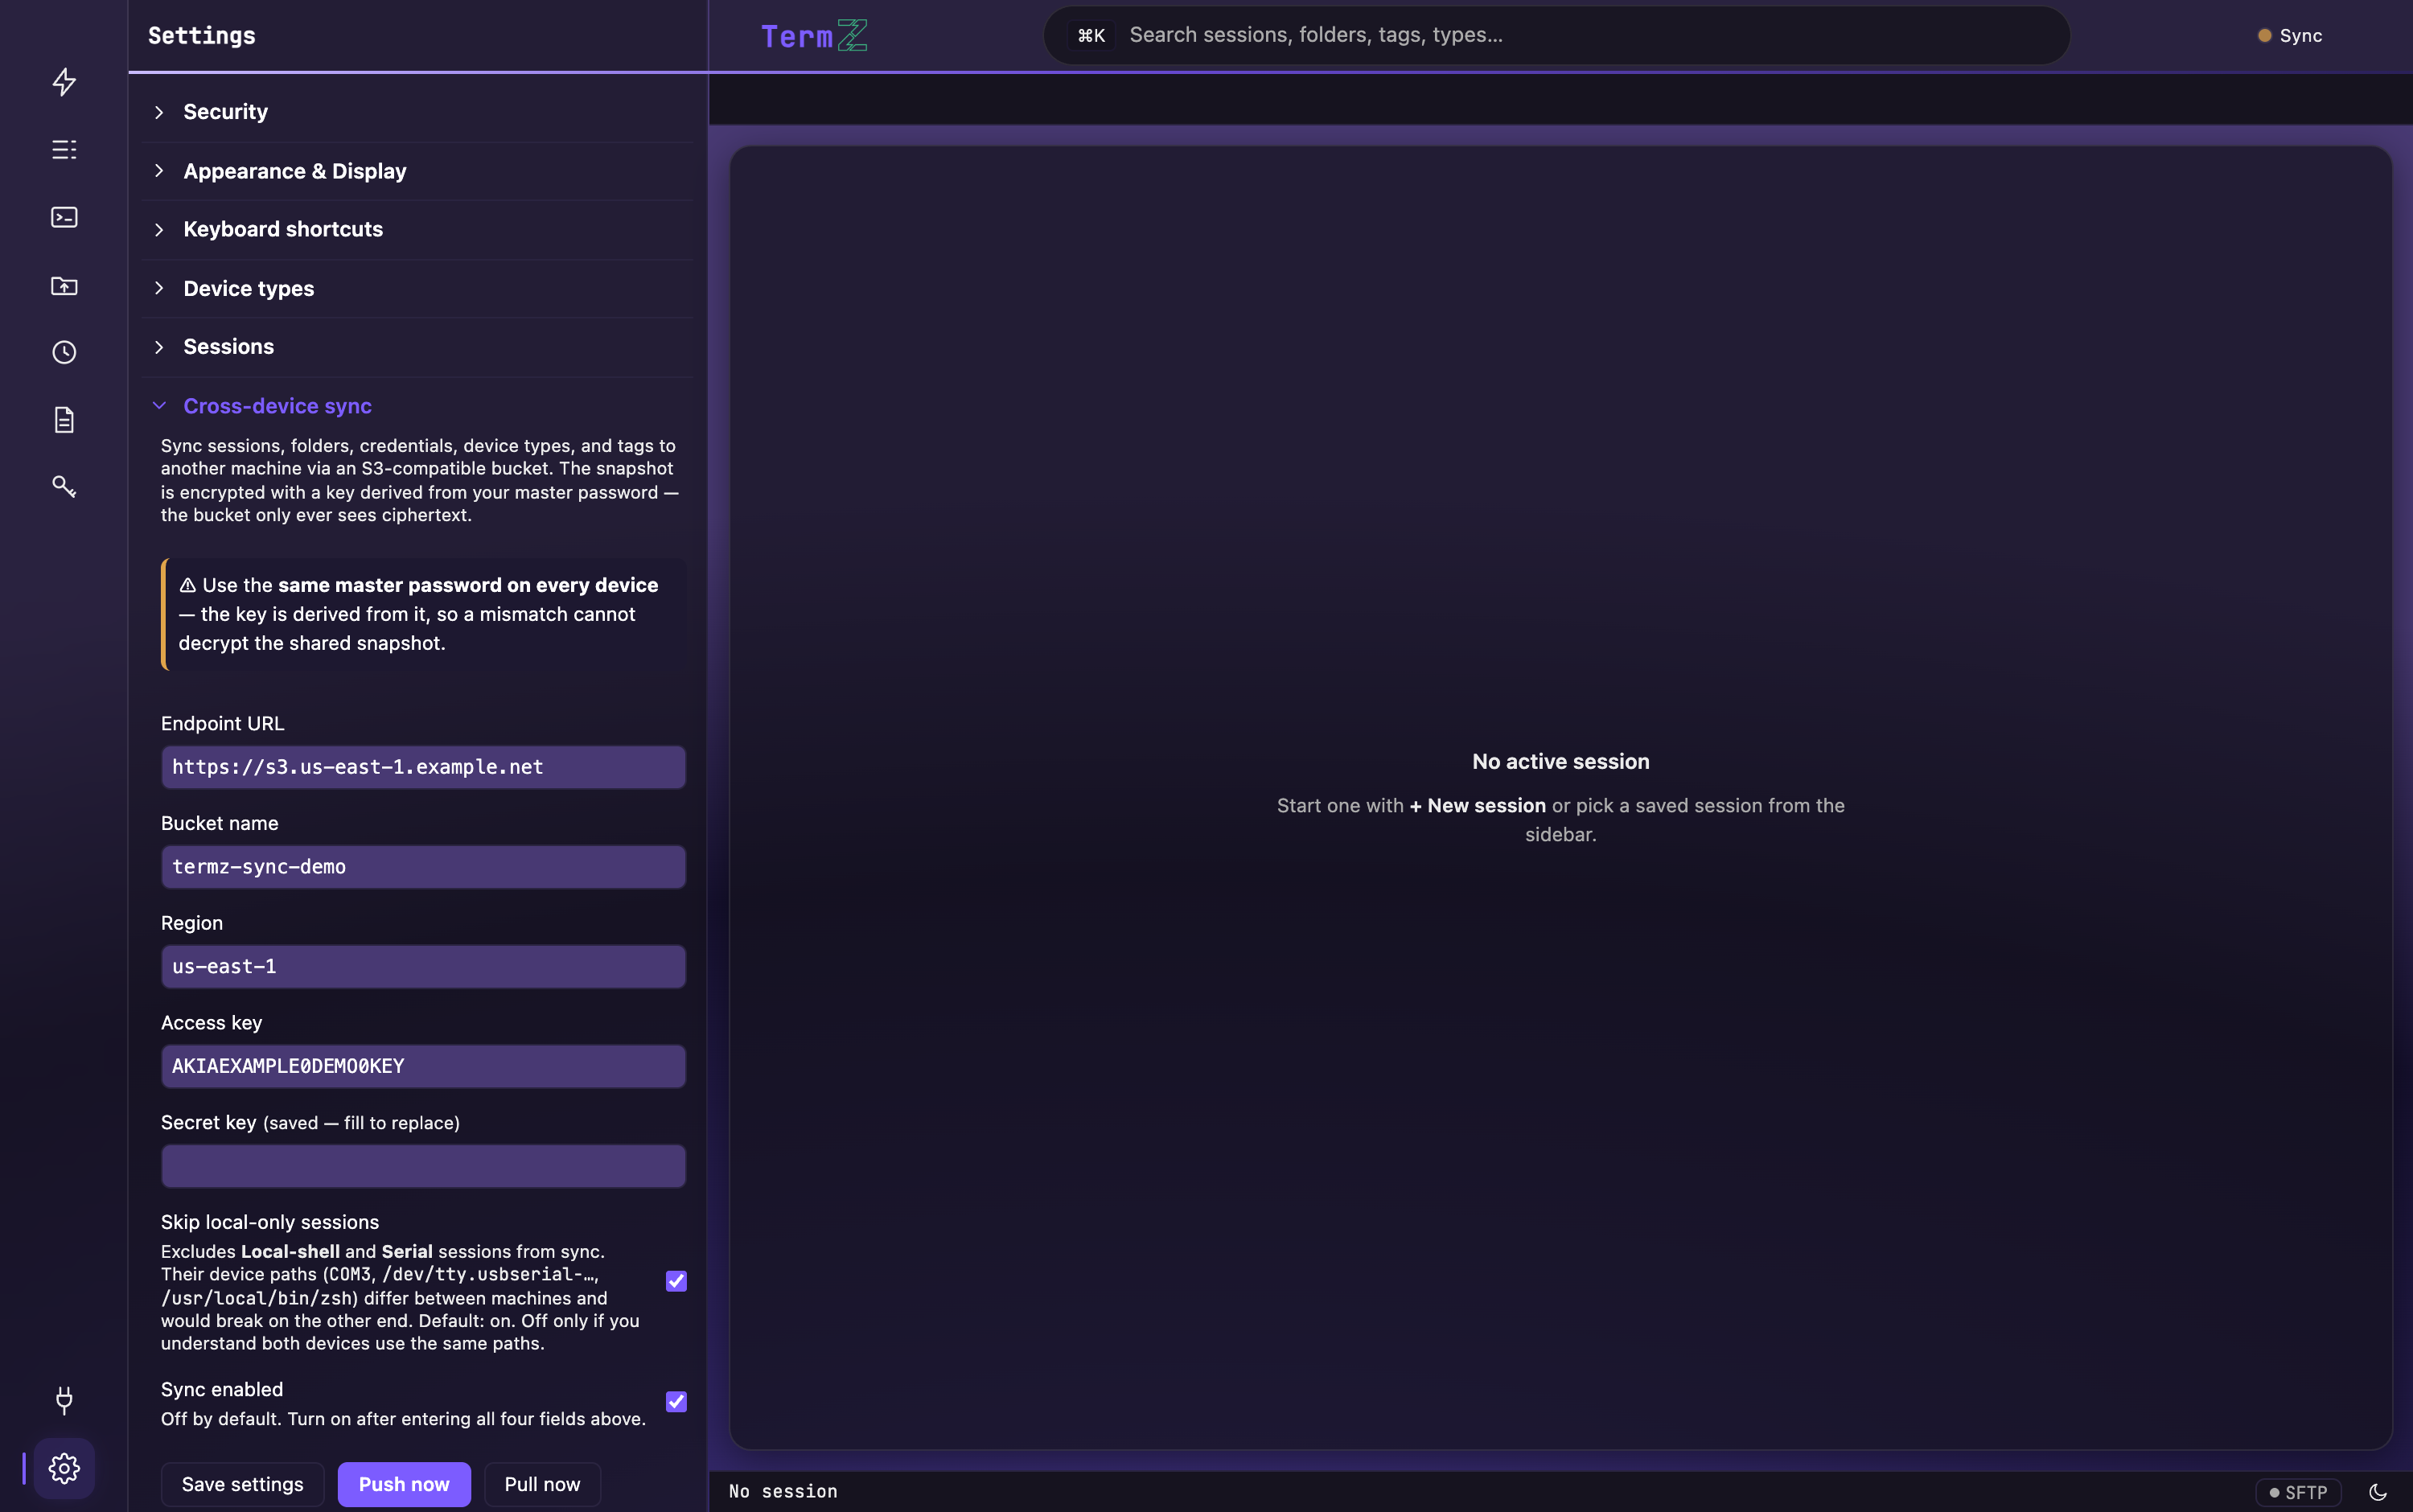
Section titled “Part 2 · Configure TermZ”In TermZ, open Settings → Sync and fill in the fields to match your bucket:
| Field | Value |
|---|---|
| Endpoint URL | https://<ACCOUNT-ID>.r2.cloudflarestorage.com |
| Bucket name | termz-sync (whatever you named it) |
| Region | auto (correct for R2) |
| Access key | the Access Key ID from Part 1 |
| Secret key | the Secret Access Key (stored encrypted in your vault; leave blank later to keep the saved one) |
- Skip local-only sessions — leave this on (default). It excludes local-shell and serial sessions, whose device paths (e.g.
COM3,/dev/tty.usbserial-…,/usr/local/bin/zsh) differ per machine and would break elsewhere. Turn it off only if every device uses identical paths. - Sync enabled — turn on once the fields above are filled, then Save.
Part 3 · Sync your devices
Section titled “Part 3 · Sync your devices”- On your first device (the one with your data), click Push now to upload the encrypted snapshot.
- On each other device, repeat Part 2 with the same bucket, same credentials, and the same master password, then click Pull now to bring the data down.
- After that, use Push after making changes and Pull to pick up changes from another device.
Good security hygiene
Section titled “Good security hygiene”- Scope the R2 token to only the sync bucket, with Object Read & Write and nothing more.
- If a device or token is lost or compromised, rotate the R2 token in Cloudflare and update the Secret key in TermZ on your remaining devices.
- Because everything is encrypted client-side, a leaked bucket or token exposes only ciphertext — but rotating still prevents further writes.